Looking for a new telescope can be very confusing. There?s a bewildering array of < telescopes
and accessories out there. In fact, it seems as though you almost
need to learn another language to understand the field. You?ll
need to consider cost, portability, versatility, usability and
appearance, and a host of other factors. Truly, the task can seem
daunting.
It?s important, therefore, to know some important ground rules.
The knowledge will help you better understand the different types of
telescopes and aid in choosing the scope that?s best for you.
First Things First - A Word About Magnification. Magnification or "power" is one of the least
important factors to be considered when you?re choosing a telescope.
The single greatest misconception about telescopes is that you need to
have lots of magnification to see objects. Not true. The telescope?s light-gathering ability, referred to as aperture,
plays the most prominent role in determining how much you see.
Magnification level has much less to do with it. Be particularly
cautious of outrageous claims of 500X or 600X magnification on
inexpensive telescopes. It?s true that magnification levels can be
pushed sky high with certain eyepieces and optical appliances.
However, image quality suffers severely - to the point where it can be
difficult to make out any detail at all. It?s far better to view
with a telescope of larger aperture and moderate magnification than to
push a smaller scope to ultra-high magnification levels. Image
size will be a bit smaller with less magnification. But because
the image you do see will be of far better quality, you?ll actually see
a lot more! Some manufacturers of "department-store-brand"
telescopes take advantage of this number-one misconception among
first-time telescope buyers - that magnification is everything.
It isn?t. So beware!
Aperture - Bigger is Better?Sometimes.
The most important attribute of a telescope is its aperture size. This
is the diameter of the telescope?s light-gathering lens or mirror -
often referred to as the telescope?s objective. It?s usually
measured in millimeters or inches. Why is aperture size
important? Because it?s like having a bigger eyeball with which
to view the heavens. The human eye is a marvel of genetics and
engineering, but it does a relatively poor job of seeing in the
dark. The big reason is that our window on the world is so small.
Humans have a maximum pupil diameter of only about 7mm at full
dilation (less as the eye ages). That means all the light the
retina can receive is what?s able to squeeze in through a tiny
opening. No wonder we?re only able to discern the brightest of
the deep-space objects! The miniscule aperture of our eyes simply
doesn?t collect enough light to allow us to see fainter objects.
In effect, we see the heavens with "built-in telescopes"
only about one-quarter inch in diameter!Man-made telescopes provide a
remedy by improving light-collection ability. A telescope with a
6-inch aperture has a diameter 24 times as great as our fully dilated
pupil. But the impact on vision is even greater than that.
The area - the amount of surface able to admit light - of the
6-inch-aperture telescope is about 28.25 square inches. Compare
this to the .05-square-inch area of the eye?s pupil, and you can see
there?s a big difference. In fact, a telescope with a 6-inch
aperture will admit more than 565 times as much light as the
human eye - a huge difference. A telescope?s optics focus this
added light into a beam small enough to get through our dilated pupil,
and - voila! - we?re able to see objects much dimmer than those
we can see with the unaided eye. That?s why aperture
- otherwise known as a telescope?s "light grasp" - is so important.
Ok. So a
telescope?s ability to gather light is paramount. Should you, then,
look for the largest telescope you can possibly afford? Not
necessarily. You don't want to forget about portability. After all,
what good is a monster telescope if you don?t use it? You will need to
ask yourself "Where will I want to use my new telescope?" If
the answer is nearby in the backyard, then having a great big telescope
will be of great advantage to you. On the other hand, if you?ll need to
take your telescope away from city lights in order to get good viewing,
you need to be concerned about size and weight. You?ll have to
wrestle your scope into your car or truck, so, beyond a certain point,
bigger and heavier is definitely not better. It?s also
good to remember you have to assemble and set up your telescope in the
dark, and that also makes ease-of-use a premium commodity.
"Dark-sky commuters" should think, therefore, in terms of the biggest scope they can handle comfortably,
rather than the biggest scope they can afford. They?ll get little
enjoyment of a new telescope if it just gathers dust in the garage
because the thought of moving it outdoors makes them cringe.
Sometimes more of a good thing is just too much. Beyond aperture: Your first major decision - W hat Type of Telescope should you buy?
Refractors, reflectors and catadioptrics demystified.
There are three basic types of telescopes - refractors, reflectors, and
catadioptrics. All three designs have the same purpose, to collect
light and bring it to a point of focus so it can be magnified with an
eyepiece for examination by the eye. Each does this work
differently, though. And each has advantages, as well as
disadvantages. We offer a discussion to help you choose among
them.
Refractors
 
Refractor scopes are what the average person identifies with the word
"telescope." These consist of a long, narrow tube in which light
passes in a straight line between the front, objective, lens and a
rear-mounted eyepiece.
Advantages
Simplicity of design contributes to ease of use and reliability;
Require little or no maintenance;
Excellent for lunar, planetary and binary star observing, especially in larger apertures;
Good for distant terrestrial viewing;
Offer high-contrast images with no secondary mirror or diagonal obstruction;
Render good color in achromatic designs and excellent in apochromatic, fluorite and ED designs;
Sealed optical tube reduces image-degrading air currents and protects optics,
Have permanently mounted and aligned objective lenses.
Disadvantages
More expensive per inch of aperture than reflector or catadioptrics designs;
Heavier, longer and bulkier than equivalent-aperture reflectors and catadioptrics;
Cost and bulk factors limit the maximum practical aperture size,
Less suited to viewing small and faint deep-sky objects because of practical aperture limitations.
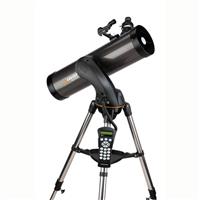
Reflector
Reflectors
usually use a concave, parabolic primary mirror to collect and focus
incoming light onto a flat secondary mirror that in turn reflects the
image out of an opening at the side of the main tube, into an eyepiece
for viewing.
 
Advantages
Lower cost per inch of aperture than offered by refractors and
catadioptrics, since mirrors can be produced at less cost than lenses
in refractors in medium to large apertures;
Reasonably compact and portable;
Excellent for faint, deep-sky objects, such as remote galaxies, nebulae and star clusters, because of their larger apertures,
Deliver very bright images with few optical aberrations.
Disadvantages
Generally not suited to terrestrial observation,
Slight light loss due to obstruction from the secondary mirror.
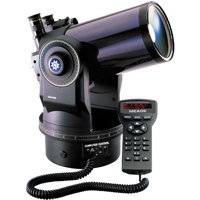
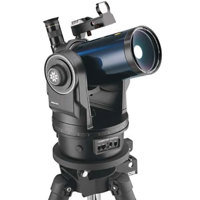
Catadioptrics
Catadioptrics
use a combination of mirrors and lenses to fold the light and form an
image. Catadioptrics are the most popular type of instrument,
with the most modern design, marketed throughout the world in apertures
of 3.5 inches and larger. There are two popular designs of these
mirror/lens "hybrids," the Schmidt-Cassegrain and the
Maksutov-Cassegrain. In the Schmidt-Cassegrain the light enters through
a thin, aspheric Schmidt correcting plate, then strikes the spherical
primary mirror and is reflected back up the tube, where it is
intercepted by a small, secondary mirror. This reflects the light
out an opening in the rear of the instrument to form an image at the
eyepiece
 
Schmidt-Cassegrain Advantages
Best all-purpose telescope design, combining the optical advantages of
both lenses and mirrors, while canceling their disadvantages;
Excellent optics with razor-sharp images over a wide field;
Excellent for deep-sky observing or astrophotography with fast films or CCD imagers;
Very good for lunar, planetary and binary star observing or photography;
Excellent for terrestrial viewing or photography;
Closed-tube design reduces image-degrading air currents;
Compact and portable;
Easy to use;
Durable and virtually maintenance-free;
Offer large apertures at reasonable prices - less expensive than equivalent-aperture refractor designs;
Greater accessory availability than is the case with other types,
Best near-focus capability of all designs.
Schmidt-Cassegrain Disadvantages
More expensive than reflectors of equal aperture;
It is not what people expect a telescope to look like,
Slight light loss due to obstruction by the secondary mirror.
Maksutov-Cassegrain
The Maksutov design is a catadioptric (using both mirrors and lenses)
with basically the same advantages and disadvantages as the Schmidt. It
uses a thick meniscus-correcting lens with a strong curvature and a
secondary mirror that is usually an aluminized spot on the corrector.
The Maksutov secondary mirror is typically smaller than the Schmidt's
giving it slightly better resolution for planetary observing.
 
The
Maksutov is heavier than the Schmidt and, because of the thick
correcting lens, takes a long time to reach thermal stability at night
in larger apertures.
The Maksutov optical design
typically is easier to make, but its corrector lens requires more
material than the Schmidt Cassegrain?s.
Now that you have read about magnification, aperture and the different types of telescopes,
you can browse our site more informed. The choice of what
telescope to buy or whether to buy one at all is up to you.
|

Magnification (Power) and Using Eyepieces |
| |
|
Understanding
how power, or magnification, is calculated when using a telescope will
require the understanding of a relationship between two independent
optical systems - the telescope itself and the eyepiece you are using.
To understand this we must first understand the term Focal Length.
Focal Length
Focal Length is the distance measured in millimeters (mm) in an optical
system from the lens or primary mirror to the point where the telescope
is in focus. This point is called the Focal Point. The longer
the focal length of the telescope, generally the more power it has, the
larger the image and the smaller the field of view. For example, a
telescope with a focal length of 2000mm has twice the power and half
the field of view of a 1000mm telescope.
Calculating Magnification (power)
To determine power in a telescope, divide the focal length of the
telescope by the focal length of the eyepiece. By exchanging an
eyepiece of one focal length for another, you can increase or decrease
the power of the telescope. For example, a 25mm eyepiece used on a
telescope with a 1000mm focal length would yield a power of 40x (1000 /
25 = 40) and a 10mm eyepiece used on the same telescope would yield a
power of 100x (1000 / 10 = 100). Since eyepieces are interchangeable, a
telescope can be used at a variety of powers for different
applications.
There are practical lower and upper limits of power for telescopes.
These are determined by the laws of optics and the nature of the human
eye. As a rule of thumb, the maximum usable power is equal to 60 times
the aperture of the telescope (in inches) under ideal conditions.
Powers higher than this usually give you a dim, lower contrast image.
For example, the maximum power on a 60mm telescope (2.4" aperture) is
142x. As power increases, the sharpness and detail seen will be
diminished. The higher powers are mainly used for lunar, planetary, and
binary star observations.
Be very cautious of
manufacturers who advertise a 375 or 750 power telescope which is only
60mm in aperture, as this is false and misleading. Many department
store brand telescopes know that customers are not informed how telescopes operate. These manufacturers of telescopes market their products to the misconception that magnification is the most important feature on a telescope.
Most of your observing will be done with lower powers - 6 to 25 times
the aperture of the telescope (in inches). With these lower powers, the
images will be much brighter and crisper, providing more enjoyment and
satisfaction with the wider fields of view.
There is
also a lower limit of power which is between 3 to 4 times the aperture
of the telescope at night. During the day the lower limit is about 8 to
10 times the aperture. Powers lower than this are not useful with most
telescope and a dark spot may appear in the center of the eyepiece in a
Catadioptric or Newtonian Reflector telescope due to the secondary or
diagonal mirrors shadow.
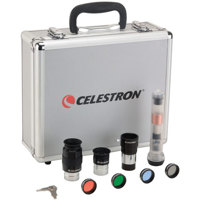
Using Eyepieces

Most telescopes
will come with 1 or more eyepieces. It is good to have a wide selection
of eyepieces for various types of observation. To truly get the most
out of your telescope it is a good idea to have a wide selection of
eyepieces. You will find that most telescopes
will come with a 25mm (sometimes 20 or 26 depending on the telescope)
because this is one of the most common eyepieces focal lengths to use
to get the optimum magnification and field of view from your telescope.
It is good to spread out your selection of eyepieces. A good selection
would be a 5mm - 10mm - 15mm - 25mm - 32mm as an example. You will find
that many companies offer kits of eyepieces that will give you a wide
selection in one package.
When choosing an eyepiece it
is good to remember this rule of thumb. The telescope is only as good
as the eyepiece. You could have the most amazing telescope quality, but
if you use a poorly manufactured eyepiece, you are not getting the
advantage of the telescope. There should be a balance between the
quality of your telescope and the quality of your eyepiece. If you have
a top-of-the-line telescope, it is wise to spend the extra money on a
suburb quality eyepiece.
Here is a list of
manufacturers that make exceptionally high quality eyepieces. Although
these eyepieces are amazing in quality - some of the prices for an
eyepiece alone could purchase a complete telescope!
TeleVue
Vixen
Pentax
Here is a list of manufacturers that make some very good eyepieces at a good price.
Celestron
Meade
Zhumell
Hardin Optical
|
|
Using a Barlow Lens
A cost effective way to increase the magnification of your eyepieces |
|
|
An extremely
useful tool every amateur astronomer should have is a Barlow
Lens. The Barlow lens was invented by Peter Barlow (1776-1862) an
English writer on pure and applied mathematics. A Barlow lens is
a concave lens that when placed between a telescopes objective lens or
mirror and the eyepiece, will increase the magnification of the
telescope.

A Barlow lens
will connect directly to your eyepiece. The most common Barlow is
the 2x Barlow. A 2x Barlow will double the magnification of the
eyepiece it is attached to. For example, if you were using a 20mm
eyepiece on a telescope with a 1000mm focal length, you would have 50x
magnification. If you attach a 2x Barlow lens to that eyepiece
you will double the effective magnification of that eyepiece to 100x.
One of the
greatest advantages of a Barlow lens is that it not only will double
the magnification - it will effectively double your eyepiece
collection! If you had a 32mm 26mm and 10mm for example, adding a
2x Barlow would be like owning a 32mm 26mm 16mm 13mm and
5mm. A Barlow is much more cost effective, as it is usually
less than the price of 1 eyepiece!
Choosing a Barlow Lens
When selecting a
Barlow lens it is critical that you select one with a barrel size that
will fit the eyepieces you are going to use it with. The barrel
size is the diameter of the eyepiece tube that fits into the
focuser. The standard eyepiece barrel size is 1-1/4 Inches.
Some eyepieces use the larger 2-inch format and some really inexpensive
telescopes
use the smaller 0.965 format. It is important that your Barlow
lens has the same barrel size as the eyepiece you are going to connect
it to.
Barlow lenses
are offered in different magnifications. The most common is
2x. This means it will double the magnification of any eyepiece
it is connected to. There are also 3x or higher Barlow
lenses. We recommend the standard and most common 2x Barlow lens
for most users. The more powerful Barlow's may not work well with
all telescopes.
Using a Barlow LensA
Barlow lens is very simple to use. Instead of dropping the
eyepiece into the focuser, you will first drop in the Barlow lens, then
your eyepiece will connect to your Barlow.
|
Image Orientation - Why is everything upside-down? |
| |
One
of the most surprising discoveries first telescope owners will find is
that images may appear upside-down or backwards depending on the type
of telescope. The first thought is the telescope is broken - when in
fact it is working perfectly normal. Depending on the type of telescope
images may appear correct, upside-down, rotated, or inversed from left
to right.
Why is this? Why would I want to see everything incorrectly? For
astronomical viewing, it is not important whether an object is shown
correctly. In space there is no up or down. Besides, Saturn is not
something you see everyday and you would not know if it was upside-down
or not. A Tree, Building, Person or an Automobile for example would be
important to see correctly. When you view an automobile upside-down,
you recognize that this is not correct. Lets talk about the different
types of telescopes and how the orientation of the image is observed
through them and what you can do to correct it for land use.
Refractor and Cassegrain telescopes
will produce an image that is upside down when used without a diagonal.
When a diagonal is used the image will be corrected right side up, but
backwards from left to right. It will look like trying to read a sign
in a mirror. There are special diagonals called Erect Image Prism
diagonals that can correct the backwards image for land use.
Newtonian Reflectors will produce an image that is upside down and
are not recommended for land use. There are no ways to correct this
with a Newtonian Reflector. 
 
|
Telescope Mounts: More Than Just a Tripod |
|
To
a large extent, a telescope is only as good as its tripod and mounting.
A telescope magnifies everything, including vibration. That's why many telescopes
with decent optics are rendered useless when supplied on a cheaply made
mount. The mount's adjustments should be smooth, yet precise, as you'll
be using them to track the slow and steady apparent movement of stars.
Smooth and precise movements - and a motor drive - are an absolute
requirement for astrophotography.
A telescope mount has
two functions - (1) Provide a system for smooth controlled movement to
point and guide the instrument, and (2) support the telescope firmly so
that you can view and photograph objects without having the image
disturbed by movement.
There are two major types of mounts for astronomical telescopes: Altazimuth and Equatorial.
Altazimuth - The simplest type of mount with two motions, altitude (up and down/vertical) and azimuth (side to side/horizontal). Altitude and Azimuth - Thus the name Altazimuth .
Good altazimuth mounts will have slow-motion knobs to make precise
adjustments, which aid in keeping tracking motion smooth. These type
mounts are good for terrestrial observing and for scanning the sky at
lower power but not for deep sky photography. Certain altazimuth mounts
are now computer driven and allow a telescope to track the sky
accurately enough for visual use but not for long exposure photography.
Dobsonian Mounts - A newer, modified version
of the Altazimuth mount is called the Dobsonian mount. The Dobsonian
mount was invented in the 1970's by John Dobson. A Dobsonian mount is
mounted on the ground by a heavy platform. A Dobsonian mount was
designed to support massively sized Newtonian Reflectors and keep a
steady image from the size and weight of the optical tube. It is common
for Dobsonian telescopes to have very large apertures - anywhere
between 6 and 20+ inches!
Equatorial -
Superior to non-computerized altazimuth mounts for astronomical
observing over long periods of time and absolutely necessary for
astrophotography. As the earth rotates around its axis, the stationary
stars appear to move across the sky. If you are observing them using an
altazimuth mount, they will quickly float out of view in both axes. A
telescope on an equatorial mount can be aimed at a celestial object and
easily guided either by manual slow-motion controls or by an electric
motor drive to follow the object easily across the sky and keep it in
view of the telescope. The equatorial mount is rotated on one axis
adjusted to your latitude and that axis is aligned to make it parallel
to their Earth's axis, so that if that axis is turned at the same rate
of the speed as the Earth, but in the opposite directly, objects will
appear to sit still when viewed through the telescope.
There are two basic types of equatorial mounts
German Equatorial Mount
- Both Newtonian Reflectors and Refractor telescopes normally use this
type mount. A large counterweight extending on the opposite side of the
optical tube is its distinguishing feature. The counterweight is needed
to balance the weight of the optical tube.
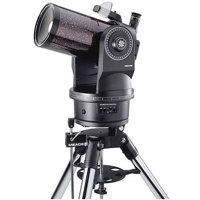
Fork Mount
- Most Catadioptric and other shorter optical tubes use this style
mount, which is generally more convenient to use than the German mount,
especially for astrophotography. A more recent state-of-the-art
computer controlled telescope allows fully automatic operation making
it extremely fun and easy to locate objects while saving the observer
considerable time and effort.
Unless the telescope is a
tabletop model, it should be set on a tripod or pier-type platform.
These must be rigid and minimize vibration. They should be portable and
lightweight as well as easy to handle and set up. Appearance can be
deceiving, as bulk and weight are not as important as a well-engineered
tripod or pier.
 
 
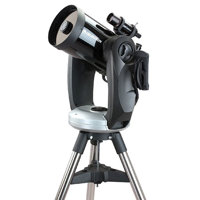
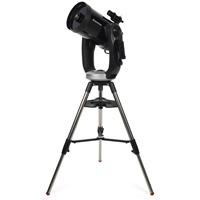
Computerized Mounts - "GO-TO" telescopes
Now many telescopes
feature computerized electronic mounts with features that will
automatically located and track objects in the sky. These telescopes
automatically take you to thousands of objects in the sky and can even
give you a guided tour! For more information see our article on Computerized GOTO telescopes and GPS telescopes |
Star Parties
A Gathering of telescopes
|
One of the best ways to get involved with telescopes and astronomy
is to attend a Star Party in your local area. You would be surprised
how close you are to an astronomy club or university that welcomes the
public to observe. A Star Party is gathering of fellow astronomers with
their telescopes - if you are going to attend a Star Party, it is
important to understand some Star Party etiquette.
Rule Number One : Light Restrictions. You always
want to be thinking that light is bad - from your cars headlights on
the drive to the location or your flashlights for the walk-around. If
you are setting up your telescope at a Star Party it is important to
arrive early enough to get everything set up before dark. Telescope
users spend a great deal of effort gradually adjusting their night
vision for best visualization with a telescope. If you show up with a
bright flashlight, you could potentially ruin someone's already
adjusted night vision. Flashlights should be covered with red colored
cellophane. It is a good idea to purchase yourself a good flashlight
just for astronomy use. You can even coat the flashlight lens with some
red nail polish for a more permanent effect. Many stores also offer red
LED flashlight that last a very long time.
More about light : Most Star Parties will not allow
campfires - so you will want to dress warm. The light from a campfire
can greatly effect the viewing conditions - the smoke from a fire can
ruin a nights observing very quickly.
Watch where you are going - It is important that
you are very careful walking about from telescope to telescope. You
never know what has been set down on the ground for a moment. You will
want to be extra careful not to trip over tripod legs that may not be
seen.
Music - Many Star Parties will have a list of rules
or a check-in station depending on how large the event. Be considerate
of others with loud music. Headphones may be the best idea.
Alcohol - The best thing to keep in mind about
Alcohol at a star party is that the location may be in a park that
prohibits consumption of alcoholic beverages. It is best to ask.
Keep it clean - It is important to take with you everything you bring. Including your garbage.
Star
Parties can range from a small group of 2 or 3 casual observers to 50+
telescopes set up across a huge field. Many star parties will provide a
list of basic rules and regulations. These are just some simple things
to keep in mind. |
Polar Alignment |
If you're like most new amateur astronomers, the first thing you
probably do when you get your new telescope properly assembled is put
in an eyepiece and point it up to look at the moon. Just the excitement
of seeing the lunar landscape up close is enough to keep you
entertained for days. But eventually, as you progress to finding more
difficult objects, such as planets and faint deep-sky objects, you will
want to utilize all the features of your equatorial mount, such as the
setting circles or perhaps even a motor drive. A mount is said to be
"equatorial" if one of its two axes can be made parallel with the
Earth's axis of rotation. Aligning the telescope to the Earth's axis
can be a simple or rather involved procedure depending on the level of
precision needed for what you want to do. For casual observing, only a
rough polar alignment is needed. Better alignment is needed for
tracking objects across the sky (either manually or with a motor drive)
at high magnifications. Still greater precision is needed in order to
use setting circles to locate those hard-to-find objects. Finally,
astrophotography will require the most accurate polar alignment of all.
Theory The
polar alignment procedure works on one simple principle: The polar axis
of the telescope must be made parallel to the Earth's axis of rotation,
called the North Celestial Pole (NCP). When this is accomplished, the
sky's motion can be cancelled out simply by turning the axis (either by
hand or with a motor drive) at the same rate as the rotation of the
Earth, but in the opposite direction. Although residents of the
northern hemisphere are convenienced with a bright star (Polaris) less
than a degree from Earth's rotational axis, the NCP can still be a
somewhat elusive place to locate.

Rough Polar Alignment

For ordinary visual observing, the telescope's polar axis must be
aligned to the Earth's pole. This simply means positioning the
telescope so that the polar axis is aimed up at Polaris. The easiest
way to accomplish this is to rotate the telescope tube to read 90° in
declination. In this position the telescope will be parallel to the
polar axis. Now, move the telescope, tripod and all, until the polar
axis and telescope tube are pointed towards Polaris. Finally, match the
angle of your telescope's polar axis to the latitude of your observing
location. Most telescopes have a latitude scale on the side of the
mount that tells you how far to angle the mount for a given latitude
(see your telescope owner's manual for instructions on how to make this
adjustment). This adjustment determines how high the polar axis will
point above the horizon. For example, if you live at 40° latitude, the
position of Polaris will be 40° above the northern horizon. Remember
your latitude measurement need only be approximate; in order to change
your latitude by 1° you would have to move your observing position by
70 miles! Polaris should now be in the field of view of an aligned
finderscope. Continue making minor adjustments in latitude and azimuth
(side to side), centering Polaris in the finder's cross hairs or low
power eyepiece. This is all that is required for a polar alignment good
enough to use your telescope's slow motion controls to easily track a
star or planet across the sky. However, in order to take full advantage
of the many features of your telescope (such as setting circle and
astrophotography capability) a more precise polar alignment will be
necessary.
Accurate Polar Alignment
Before we can be certain that the telescope's polar axis is
accurately aligned with the rotational axis of the Earth, we must first
be certain that the finderscope (which will actually be used to polar
align the mount) is aligned with the telescope's polar axis.
For polar alignment purposes, the finderscope itself can be used to
accurately align the mount's polar axis by adjusting the finder inside
its bracket. This is quite simple since the finder is easily adjusted
using the screws that hold it inside the bracket. Also, the
finderscope's wide field of view will be necessary for locating the
position of the North Celestial Pole relative to Polaris. Here's how
it's done:
Set up your mount as you would for polar alignment. The DEC setting
circle should read 90° . Rotate the telescope in Right Ascension so
that the finderscope is positioned on the side of the telescope tube.
Adjust the mount in altitude and azimuth until Polaris is in the field
of view of the finder and centered in the cross hairs.
Now, while looking through the finderscope, slowly rotate the
telescope 180° around the polar axis (i.e. 12 hours in Right Ascension)
until the finder is on the opposite side of the telescope. If the
optical axis of the finder is parallel to the polar axis of the mount,
then Polaris will not have moved, but remain centered in the cross
hairs. If, on the other hand, Polaris has moved off of the cross hairs,
then the optical axis of the finder is skewed slightly from the polar
axis of the mount. If this is the case, you will notice that Polaris
will scribe a semi-circle around the point where the polar axis is
pointing. Take notice how far and in what direction Polaris has moved.
Using the screws on the finder bracket, make adjustments to the
finderscope and move the cross hairs halfway towards Polaris' current
position (indicated by the "X" in Figure B below). Once this is done,
adjust the mount itself in altitude and azimuth so that Polaris is once
again centered in the cross hairs. Repeat the process by rotating the
mount back 180° , and adjusting the finder bracket screws until the
cross hairs are halfway between their current position and where
Polaris is located, and then centering Polaris in the cross hairs by
adjusting the mount in altitude and azimuth. With each successive
adjustment the distance that Polaris moves away from center will
decrease. Continue this process' until Polaris remains stationary in
the cross hairs when the mount is rotated 180º. When this is done, the
optical axis of the finderscope is perfectly aligned with the polar
axis of the mount. Now the finder can be used to polar align the mount.
So far we have accomplished aligning the polar axis of the telescope
with the North Star (Polaris), but as any star atlas will reveal, the
true North Celestial Pole (NCP) lies about 3/4° away from Polaris,
towards the last star in the Big Dipper (Alkaid). To make this final
adjustment, the telescope mount (not the telescope tube) will also need
to be moved away from Polaris towards the actual NCP. But the question
is; since Polaris makes a complete rotation around the Celestial Pole
once a day, how far should the mount be moved and in what direction?
Let's take an example: suppose you are out observing on August 1 st at
8:00 p.m.. A quick inspection of the northern sky will reveal that the
last star in the handle of the Big Dipper, Alkaid, lies above and to
the left of Polaris in the 10 o'clock position. Now, while looking
through the finderscope (with Polaris still centered in the cross
hairs) adjust the latitude and azimuth of the mount up and to the left
until Polaris also moves up and to the left in your straight through
finderscope. (Remember a straight through finder inverts the image, so
Polaris will appear to move in the same direction as the mount is
moved). How far to move Polaris will depend on the field of view of the
finderscope. If using a finderscope with a 6° field of view, Polaris
should be offset approximately 1/3 of the way from center to edge in
the finder's view (i.e. half of the field of view, from center to edge,
equals 3° and 1/3 of that equals 1° ). This calculation can be
approximated for any finderscope with a known field of view.

The mount's setting circles can now be used to determine just how
close the polar axis is to the NCP. First, aim the telescope tube (be
careful not to move the mount or tripod legs) at a bright star of known
right ascension near the celestial equator. Turn the right ascension
setting circle to match that of the bright star. Now, rotate the
telescope tube until it reads 2 hours 30 minutes (the right ascension
of Polaris) and +89¼° declination. Polaris should fall in the center of
the finder's cross hairs. If it doesn't, once again move the mount in
latitude and azimuth to center Polaris.
This procedure aligns the telescope mount to within a fraction of a
degree of the NCP; good enough to track a star or planet in a medium
power eyepiece without any noticeable drift. However, long exposure
astrophotography is far less forgiving and film will easily reveal even
the smallest amount of motion. At this point, you may be wondering why
bother polar aligning any more accurately if you can use the slow
motion controls or drive corrector to keep a guide star centered in the
cross hairs of an eyepiece. Unfortunately, keeping the guide star
centered in the cross hairs is only half the battle. Since, the polar
axis is not perfectly in line with the Earth's axis, the stars in the
field of view will slowly rotate as you guide. You will get a sharp
image of the guide star, but the other stars on the photograph will
appear to rotate around the guide star. This is also why you cannot
accurately do guided photography with an Altitude-Azimuth (Altazimuth)
style mount.
The above method of polar alignment is limited by the accuracy of
your telescope's setting circles and how well the telescope is aligned
with the mount. The following method of polar alignment is independent
of these factors and should only be undertaken if long-exposure, guided
photography is your ultimate goal. The declination drift method
requires that you monitor the drift of selected stars. The drift of
each star tells you how far away the polar axis is pointing from the
true celestial pole and in what direction. Although declination drift
is simple and straight-forward, it requires a great deal of time and
patience to complete when first attempted. The declination drift method
should be done after the previously mentioned polar alignment steps
have been completed.
To perform the declination drift method, you need to choose two
bright stars. One should be near the eastern horizon and one due south
near the meridian. Both stars should be near the celestial equator
(i.e., 0° declination). You will monitor the drift of each star one at
a time and in declination only. While monitoring a star on the
meridian, any misalignment in the east-west direction is revealed.
While monitoring a star near the east horizon, any misalignment in the
north-south direction is revealed. As for hardware, you will need an
illuminated reticle ocular to help you recognize any drift. For very
close alignment, a Barlow lens is also recommended since it increases
the magnification and reveals any drift faster. When looking due south,
insert the diagonal so the eyepiece points straight up. Insert the
cross hair ocular and rotate the cross hairs so that one is parallel to
the declination axis and the other is parallel to the right ascension
axis. Move your telescope manually in R.A. and DEC to check
parallelism.
First, choose your star near where the celestial equator (i.e. at or
about 0º in declination) and the meridian meet. The star should be
approximately 1/2 hour of right ascension from the meridian and within
five degrees in declination of the celestial equator. Center the star
in the field of your telescope and monitor the drift in declination.
If the star drifts south, the polar axis is too far east.
If the star drifts north, the polar axis is too far west.
Using the telescope's azimuth adjustment knobs, make the appropriate
adjustments to the polar axis to eliminate any drift. Once you have
eliminated all the drift, move to the star near the eastern horizon.
The star should be 20 degrees above the horizon and within five degrees
of the celestial equator.
If the star drifts south, the polar axis is too low.
If the star drifts north, the polar axis is too high.
This time, make the appropriate adjustments to the polar axis in
altitude to eliminate any drift. Unfortunately, the latter adjustments
interact with the prior adjustments ever so slightly. So, repeat the
process again to improve the accuracy, checking both axes for minimal
drift. Once the drift has been eliminated, the telescope is very
accurately aligned. You can now do prime focus deep-sky
astrophotography for long periods.
NOTE: If the eastern horizon is blocked, you may choose a star near
the western horizon, but you must reverse the polar high/low error
directions. Also, if using this method in the southern hemisphere, the
direction of drift is reversed for both R.A. and DEC.
Even with a telescope with a clock drive and a nearly perfect
alignment, most beginners are surprised to find out that manual guiding
may still be needed to achieve pinpoint star images in photographs.
Unfortunately, there are uncontrollable factors such as periodic error
in the drive gears, flexure of the telescope tube and mount as the
telescope changes positions in the sky, and atmospheric refraction that
will slightly alter the apparent position of any object.
Polar alignment, as performed by many amateurs, can be very time
consuming if you spend a lot of time getting it more precise than is
needed for what you intended to do with the telescope. As one becomes
more experienced with practice, the polar alignment process will become
second nature and will take only a fraction of the time as it did the
first time. But remember that when setting up your telescope's
equatorial mount, you only need to align it well enough to do the job
you want. |
Adjusting Your Eyes To The Dark
The Importance of Good Night Vision
|

Go outside at night and look up at the stars. You may not see many
right away. But the longer you stay in the dark, the more stars you
will see. This is because your night vision has improved. Your night
vision will dramatically improve after about 10 minuets of being in the
dark. You will be at your best night vision in about a half hour.
It takes time for your eyes to fully adjust for nighttime use. When
your eyes have fully adjusted, it is very important to keep them that
way. It will be important to stay away from light. For example, if you
needed to go inside for something, it is best not to and ask someone to
bring it to you. If you must, have some sunglasses with you and keep
the lights to a minimum. It would be best however to avoid lights as if
they would hurt you! Many avid astronomers will actually where
sunglasses for a while inside before going outdoors - some will even
where an eye-patch over their observing eye to preserve night-vision
Observing Areas - Get It Dark and Keep It Dark While
it is best to choose an observing area free from streetlights and city
lights that is not always possible. Definitely turn off all the lights
that you can, including house lights, garage lights - any lights you
can. You want your observing area to be as dark as possible.
Maybe you have a park nearby that is farther away from streetlights
and city lights; this would be your best choice for observing.
Flashlights - Red is Best It
is a good idea to own a red flashlight. Flashlights should be covered
with red colored cellophane. It is a good idea to purchase yourself a
good flashlight just for astronomy use. You can even coat the
flashlight lens with some red nail polish for a more permanent effect.
Many stores also offer red LED flashlight that last a very long time.
Remember - Avoid all light as if it would harm you! |
Eyepiece Formats
Make Sure It Will Fit
|
Eyepieces are available in different barrel sizes or formats. This
"format" is a measurement of the diameter of the barrel size that drops
into the telescopes focuser. There are 3 different sizes of eyepieces. 1.25 Inch - 2 Inch - and 0.965 Inch
The most common format of eyepieces is the 1-1/4 inch format. You
could almost call this the "standard" for eyepiece size. Nearly all
brands of telescopes use this common size.
Many telescopes have the option of using the larger 2 Inch format
eyepieces. 2 Inch format eyepieces will give you much larger fields of
view. Some telescopes have focusers that are ready for 2 Inch eyepieces and some will require a special diagonal to convert to the 2-inch format.
The last format is the 0.965 inch format. These eyepieces are common
on inexpensive department store telescopes. If you have a telescope
that will only accept the 0.965" format eyepieces you can purchase
adapters that will convert the telescope to accept the more standard
1-1/4 inch format.
Eyepiece and Telescope brands do not need to match. If you have a
telescope that is no longer manufactured and you are looking for
replacement eyepieces, you do not need to purchase the same brand. You
do however need to purchase the same format. |
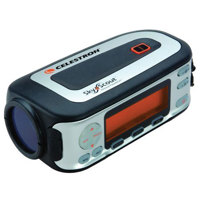
Computerized GO TO and GPS telescopes
Automatically Locate and Track Objects in the Sky
|
 
One of the most revolutionary enhancements of telescopes in recent years is the computerized auto-finding telescope. These telescopes
have the ability to take the user directly to any object in the sky at
the push of a button. Commonly known as GOTO telescopes, these
instruments are changing how the backyard astronomer uses telescopes.
This article will talk about how GOTO telescopes work and how they do much more than just find objects.
Simple - But not that simple - A
telescope that automatically moves and takes you to objects in the sky!
As amazing as that sounds there is a bit of pre set-up work that needs
to be done. It is not as simple as setting the telescope on the ground
and pressing the "Saturn" button. The telescope first needs to be
aligned.
Alignment Procedure In
order for a GOTO telescope to accurately point to objects in the sky,
it must first be aligned with two known positions (stars) in the sky.
With this information the telescope can create a model of the sky,
which it uses to locate any object with known coordinates. The most
common way to align a GOTO telescope is the 2 Star Alignment. The GOTO
telescope will ask the user to input simple information such as Date,
Time and Location - This basic information will have the telescope
roughly aligned. Now it will need to be fine-tuned. Based on the
information you have provided the telescope it will automatically
select a bright star that is above the horizon and start moving towards
it. This movement of the telescope is known as slewing . At
this point the telescope is only roughly aligned, so the alignment star
should only be close to the field of view of the Finder Scope. Once
finished moving, the display will ask you to use the hand controller to
center the selected star in the view of the eyepiece. Centering the
star in the eyepiece will now give the telescope an extremely accurate
reference point.
After the first alignment star has been entered the telescope will
automatically slew to a second alignment star and have you repeat the
same procedure for that star. When the telescope has been aligned to
both stars the display will tell you it is finished its alignment and
you are now ready to find your first object!
If the wrong star was centered and aligned to, the telescope will
display that the alignment was not completed successfully. If you are
not sure if the correct star was centered, remember that the alignment
stars will be the brightest stars nearest the field of view of the
finderscope. There may be other fainter stars visible that are closer
to the center of the finderscope, but the actual alignment star will be
obviously brighter than any other star in the area.
The alignment procedure is far from difficult, but it does take some
practice. The reward of having thousands of objects at the push of a
button is simply amazing.
Automatic Tracking - Locate and Track GOTO telescopes do something maybe more important than locating objects - they also track
the object. Why is this important? The Earth is rotating on its axis
and the telescope needs to also rotate in the opposite direction to
counter the movement of the Earth. If you where to stand outside and
point your arm up at the Moon and not move your arm, eventually you
would not be pointing at the Moon anymore.
In a telescope, this speed is greatly amplified. Let's say, for
example, you are viewing Saturn at a magnification of 40x - if you are
not tracking, Saturn will only stay in the view of your eyepiece for a
few seconds. Imagine if you are magnifying the same object at 100x
magnification or more! The need to track an object is critical to
enjoying observing anything from the moon to deep space galaxies. GOTO
telescope will not only locate the object, but they will automatically
track the object in the sky by turning in the opposite direction of the
Earths rotation at the appropriate speed.
GPS Powered GOTO telescopes Many
GOTO telescope also have GPS - Global Positioning System - features
built right into the telescope. A GPS powered telescope will make the
alignment procedure dramatically easier. There is no need to enter any
date, time or location because the GPS will tell the telescope where it
is on Earth within a matter of a few feet! When the telescope slews to
the 2 alignment stars, they are very accurate. The telescope will still
require you to fine tune the alignment by centering the alignment stars
in the view of the eyepiece. |
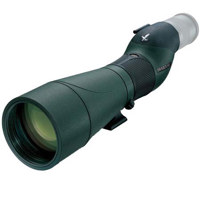
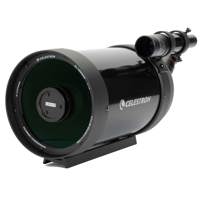
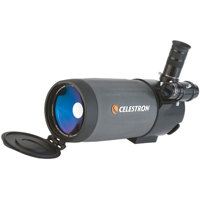
Got a Nice View?
The Advantages of Spotting Scopes vs. telescopes
|
 Got
a beautiful view of the ocean or a patio overlooking the golf course?
Many customers look to a Telescope to bring these views closer to home
when a Spotting Scope may be the better choice.
If your objective is to use a magnifying device strictly for land
use then a Spotting Scope may be the best choice. A Spotting Scope is
essentially a telescope but it is designed for land-based observation.
Most telescopes will come with more bells and whistles than is needed
for simple land based observation. More importantly a telescope may not
give you a correct image and may have upside down or inverted images
and you will have to purchase an accessory to correct this. For more
information see our article: Image Orientation - Why Is Everything
Upside-Down?
A Spotting Scope will usually be much more portable than a large
telescope and will be easier to use for land based observing. Many
Spotting Scopes feature a zoom eyepiece or will accept standard
telescope eyepieces.
So does this mean a Spotting Scope is not going to work for
astronomy? Not the case. A Spotting Scope will be primarily for land
observation but will also be excellent for simple Moon and Star
watching. If you are looking to examine the Moons of Jupiter than a
Spotting Scope will not be for you. A telescope would be the better
option.
Use the 80/20 Rule To
decide between a Spotting Scope and a Telescope you want to first
decide what you want to use it for. If you were thinking something like
80% land observation and 20% moon and stars - a Spotting Scope would be
the better choice. If it is the opposite than an appropriate telescope
will be the better option.
Looks do matter.
When choosing a Spotting Scope or
Telescope for your home or patio it is important to get one that is
attractive looking to you. If this is a piece that will always be
set-up - don't let it be an eyesore. Spotting Scope and telescopes will
come in different sizes and colors. Be sure to choose something you
will be happy to look at as well as through. |
Observing Our Closest Star
The Sun
|
The Sun, our closest star is about 93,000,000 miles away from Earth.
It is so far away that light traveling at a speed of 186,000 miles per
second, will take about 8 minutes to reach us. Why about 93
million miles away? The Earth does not travel around the sun in a
perfect circle. Our orbit around the Sun is elliptical. This means that
the distance between Earth and the sun changes during a year. Around
January 2 nd the sun is 91.4 million miles away and around July 2 nd it
is 94.8 million miles away. Give or take a few inches!
 
Observe The Sun Safely - Never look at the Sun without a filter!
To observe the sun with your telescope you will need an appropriate
solar filter fitted for your telescope. Most telescopes have the option
of purchasing a matching solar filter special designed to fit the
telescope. With a solar filter you can see detail in sunspots, bright
faculae near the limb and the mottled areas known as granules with
these filters. The Sun offers constant changes and will keep your
observing interesting and fun. Even small aperture telescopes can enjoy
features of the Sun.
We strongly recommend only using a solar filter that covers the
objective of the telescope. These are called Full Aperture Solar
Filters. Some telescopes come with a "Solar Filter" that screws into
the eyepiece. These filters are very unsafe and should be avoided.
Don't Forget about the Finderscope!
Locating the sun with a Solar Filter can be difficult. Never use the
finderscope to locate the sun. It is best to remove or cover the
finderscope so you will have no accidents. A neighbor or friend walking
by may not understand the care needed to observe the sun and may peek
into the wrong scope!
Locate the sun first by moving the telescope to the general area of
the sun by hand. Then watch the shadow that the telescope itself gives
off on the ground. When the shadow is shortest, you will be very close
to the sun. It is also a good idea to use a very low powered eyepiece
to first observe. This will give you the largest field of view and make
locating the sun much easier.
If you take anything away from this article, it is that you need to
be careful. This should not scare you away from the enjoyment of
observing the sun, as long as you have the appropriate filter and
always think safety, observing the sun will give your telescope
24-hours a day of enjoyment! |
Filters Filters Filters
How Different Filters Can Better Your View
|
You just got your new telescope - you carefully opened the box and
followed all the instructions. That sun just will not go down fast
enough. Finally, darkness falls. The first thing a new telescope owner
will do is point it up at the Moon and look into the eyepiece. Wow.
But if you can imagine, the Moon actually can appear better than
that when properly filtered. telescopes have the ability to attach
filters for many different purposes - some of the most common filters
are for looking at the Moon, Planets and Sun.
Eyepiece filters are an invaluable aid in lunar and planetary
observing. They reduce glare and light scattering, increase contrast
through selective filtration, increase definition and resolution,
reduce irradiation and lessen eye fatigue.
 
Moon Filters
A Moon Filter will thread directly onto the bottom of your eyepiece.
Nearly all eyepieces are threaded for filters. Think of a Moon Filter
like sunglasses for your telescope. Moon Filters will cut down glare
and bring out much more surface detail and give you better contrast.
 
Planetary Filters
Astronomical filters work by blocking out certain colors in the
visible spectrum of light. A red filter, for example, will block out
all but the red wavelength of light. If you look at an object that is
primarily red while using a red filter, the object will appear very
bright. Areas which are not red will appear more clearly because they
contrast with the wavelength of light which is being passed by the
filter.
When using filters, make note of the visible light transmission
(VLT) of the filter you would like to use. The VLT is a number, which
describes the overall amount of light that is allowed to pass through
the filter. The lower the VLT number, the dimmer an image will appear.
Filters with a VLT less than 40% are not recommended for use on
telescopes with an objective aperture of less than 6 inches due to the
decreased image brightness.
Filters are sorted by the Kodak Wratten numbering system. Each
filter is listed by its color and Wratten number. The Wratten numbers
will help to ensure similar results between different filters. The
image should appear the same when viewed through any #82A Light Blue
Filter, for example.
Here is a list of some of the most commonly used astronomical color filters and some suggested uses for each of them.
 #8 Light Yellow - 83% VLT #8 Light Yellow - 83% VLT
A light yellow filter helps to increase the detail in the maria on
Mars, enhance detail in the belts on Jupiter, increase resolution of
detail in large telescope when viewing Neptune and Uranus, and enhance
detail on the moon in smaller scopes
 #11 Yellow Green - 78% VLT #11 Yellow Green - 78% VLT
Yellow-Green helps to bring out dark surface detail on Jupiter and
Saturn, darkens the maria on Mars, and improves visual detail when
viewing Neptune and Uranus through large telescopes.
 #12 Yellow - 74% VLT #12 Yellow - 74% VLT
Yellow filters help greatly in viewing Mars by bringing out the
polar ice caps, enhancing blue clouds in the atmosphere, increasing
contrast, and brightening desert regions. Yellow also enhances red and
orange features on Jupiter and Saturn and darkens the blue festoons
near Jupiter's equator.
 #21 Orange - 46% VLT #21 Orange - 46% VLT
An orange filter helps increase contrast between light and dark
areas, penetrates clouds, and assists in detecting dust storms on Mars.
Orange also helps to bring out the Great Red Spot and sharpen contrast
on Jupiter.
 #23A Light Red - 25% VLT #23A Light Red - 25% VLT
Light red filters help to make Mercury and Venus stand out from the
blue sky when viewed during the day. Used in large telescopes, light
red sharpens boundaries and increases contrast on Mars, sharpens belt
contrast on Jupiter, and brings out surface detail on Saturn.
 #25A Red - 14% VLT #25A Red - 14% VLT
Red provides maximum contrast of surface features and enhances
surface detail, polar ice caps, and dust clouds on Mars. Red also
reduces light glare when looking at Venus. In large telescopes, a red
filter sharply defines differences between clouds and surface features
on Jupiter and adds definition to polar caps and maria on Mars.
 #38A Dark Blue - 17% VLT #38A Dark Blue - 17% VLT
Dark blue provides detail in atmospheric clouds, brings out surface
phenomena, and darkens red areas when viewing Mars. Dark blue also
increases contrast on Venus, Saturn, and Jupiter in large scopes.
#47 Violet - 3% VLT
Violet is recommended only for use on large telescopes. A violet
filter enhances lunar detail, provides contrast in Saturn's rings,
darkens Jupiter's belts reduces glare on Venus, and brings out the
polar ice caps on Mars.
#56 Light Green - 53% VLT
Light Green enhances frost patches, surface fogs, and polar
projections on Mars, the ring system on Saturn, belts on Jupiter and
works as a great general-purpose filter when viewing the Moon.
 #58 Green - 24% VLT #58 Green - 24% VLT
Dark green increases contrast on lighter parts of Jupiter's surface,
Venutian atmospheric features, and polar ice caps on Mars. Dark green
will also help bring out the cloud belts and Polar Regions of Saturn.
 #80A Blue - 30% VLT #80A Blue - 30% VLT
A Blue filter provides detail in atmospheric clouds on Mars,
increases contrast on the moon, brings out detail in belts and polar
features on Saturn, enhances contrast on Jupiter's bright areas and
cloud boundaries. A blue filter is also useful in helping to split the
binary star Antares when at maximum separation.
#82A Light Blue - 73% VLT
Light blue functions much the same as #80A Blue while maintaining
overall image brightness. Light blue will also help to increase
structure detail when looking at galaxies.
Other kinds of filters
Light Pollution Reduction Filters (LPR) are
designed to selectively reduce the transmission of certain wavelengths
of light, specifically those produced by artificial light. This
includes mercury and both high and low pressure sodium vapor lights. In
addition, they block unwanted natural light caused by neutral oxygen
emission in our atmosphere. As a result, LPR filters darken the
background sky, making deep-sky observation and photography of nebulae,
star clusters and galaxies possible from urban areas. LPR filters and
not sued for lunar, planetary or terrestrial photography.
Solar Filters For more information on Solar Filters for observing the Sun. Please see our article, Observing Our Closest Star - The Sun |
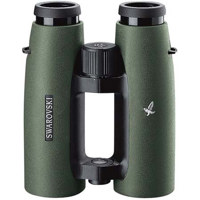
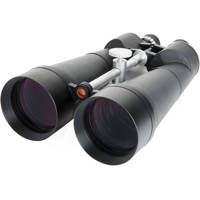
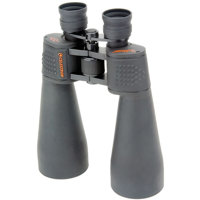
Using Binoculars for Astronomy
|
Not interested in the complexities of a telescope? A good pair of
binoculars can bring the heavens closer in a much easier to use
package. Binoculars give you the advantage of using both eyes for a
more three dimensional stereo view. Binoculars can be very good for
observing the moon and stars. The Orion Nebula and Andromeda Galaxy are
easy to spot on a dark clear night. Even Jupiter and its Moons are
visible through a pair of binoculars.
 
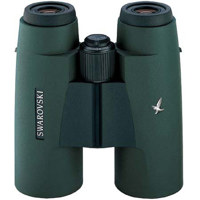
Choosing a binocular for Astronomy When
choosing a binocular for astronomy you first need to understand how
binoculars work. Similar to telescopes, a binocular needs to gather
light. The same critical feature for telescopes is the same in
binoculars - you need a large enough objective lens to gather light.
Binoculars are measured with two key features - its magnification
and its objective lens. For example, a binocular may be listed as
10x50. The first number 10 is the magnification of the binocular. The
second is the size of the objective or outside lens in millimeters. 10
times the naked eye with a 50mm objective.
Like telescopes, objective is the most important factor. It's the
same for binoculars for astronomy. We recommend a minimum of a 50mm
objective lens for astronomy. A 7x50 or 10x50 are very common choices
for astronomy. They offer a large enough objective lens and a
magnification that is enough to bring objects close enough to observe.
Giant Binoculars Even better for
astronomy is the larger objective lens binoculars. Many astronomy
binoculars will features objective lenses between 60mm to 100mm or even
more. These larger binoculars will usually require a tripod, as they
are very heavy. The larger objective size binoculars will often have
much more magnification than traditional sized binoculars. Powers of
10x, 15x, 20x or more are common on larger astronomy binoculars. When
you have binoculars of this size and magnification - having a steady
hand is usually not enough. Having them mounted on a tripod will give
you the best results. Many giant binoculars will have a built-in tripod
mount or have an adapter included or sold separately.
Image Stabilized Binoculars 
One of the greatest advancements in binoculars is the Image
Stabilized binocular. Brands such as Canon and Nikon have developed a
revolutionary method of stabilizing the image with a tiny
microprocessor inside to counter the movement of your hands. These
binoculars are amazing for astronomy as you can have all the advantages
of high power magnification without the need of a tripod. |
What Can You See With A Telescope?
|
Astronomy is a fascinating lifetime hobby enjoyed by young children
to centenarians, by people from all walks of life and with varied
interests.
You can observe or photograph the heavens on a casual or serious
basis, undertake scientific study or marvel at the wonderment of our
existence. Astronomy can be a fun and relaxing way to soothe our minds
and bodies from our hectic everyday life. It is a way to enjoy nature,
being outside and marveling at the night sky.
So what can you expect to see?
The Moon Prepare for an
awesome spectacle. The moon's disk has a pastel-cream and gray
background, streamers of material from impact craters stretch halfway
across the lunar surface, river-like rilles wind for hundreds of miles,
numerous mountain ranges and craters are available for inspection. At
low or high power the moon is continually changing as it goes through
its phases. Occasionally you will be treated to a lunar eclipse.
The Sun It is
quite safe to view the Sun if you utilize a proper solar filter. The
Sun is fascinating to inspect as you detect and watch the ever-changing
sunspot activity. If you are fortunate enough, and are willing to
travel to remote locations, you may at some point experience a solar
eclipse. For more information see our article - Observing The Sun
The Planets Observation
of planets will keep you very busy. You can see Jupiter with its great
red spot change hourly, study the cloud bands and watch its moons
shuttle back and forth. Study Saturn and its splendid ring structure,
watch Venus and Mercury as they go through their moon-like phases.
Observe Mars and see its polar cap changes or watch the dust storms and
deserts bloom with life. Uranus, Neptune and Pluto can be seen easily
with 8" or larger telescopes.
Star Clusters There are
two types of star clusters- (1) open star clusters (also called
galactic clusters) which are loosely arranged groups of stars,
occasionally not too distinctive from the background stars, and (2)
globular star clusters which are tightly packed groups of many millions
of stars.
NebulaeThese are
glowing clouds of gas falling into two types- (1) planetary nebulae
which are relatively small ball-shaped clouds of expanding gases and
are believed to be the remnants of stellar explosions, and (2) diffuse
nebulae which are vast, irregularly-shaped clouds of gas and dust
Galaxies
These are vast, remote "island universes," each composed of many
billions of stars. Galaxies exist in a variety of sizes with regular
and irregular shapes.
Comets
Magnificent comets are routinely visible through telescopes .
Double (Binary) Stars These are pairs of stars orbiting around a common center of gravity, often of different and contrasting colors.
What you can see is dependent on a lot of factors. The most
important of these for astronomy is aperture. The ability for a
telescope to gather light is critical. Other important factors are
optical quality, steadiness of your tripod and mount, seeing
conditions, your location (city or rural), brightness of the object and
your experience. |
Astrophotography - Making The Connection
|
Astrophotography can be a fun and rewarding hobby. Even a novice
telescope user can take beautiful images of the moon and stars. There
are many types of astrophotography from simple piggyback photography -
by mounting your camera on top of your telescopes optical tube to fully
connecting your telescope to a 35mm or Digital camera.
Piggy Back Astrophotography One of the
simplest methods of astrophotography is to attach your camera directly
to the top of your optical tube. This will allow the mount and its
motor drive to also move the camera. Most telescopes have the ability
to purchase a piggy back bracket to let the camera go for a ride.
Connecting your 35mm or Digital Camera A
more advanced way to take astronomical images is directly through the
telescope connected to a camera. To attach a camera to a your telescope
you will require 2 simple parts. A T-Adapter and a proper T-Ring for
your camera brand. The T-Adapter will connect to your telescope. A
T-Ring specific to your camera will attach to your camera. The now the
telescope and the camera are ready to be connected. With this simple
connection you can take amazing images or the moon and planets and with
practice, you can take stunning images of deep space objects such as
Galaxies and Nebulae.

Connecting the modern Digital cameras to telescopes is still pretty
new. Most digital cameras do not have threaded lenses and require very
specific attachments specific to the camera itself. The company
ScopeTronix is a brand that we offer that has developed a connection
for hundreds of digital cameras. Odds are if you have a digital camera
- we have a connection that can make it fit. |
Can you see the flag or other objects left behind on the moon from the Apollo missions?
|

Unfortunately the answer to this question is no. Not even the most
powerful telescopes ever made are able to see these objects. The flag
on the moon is 125cm (4 feet) long. You would require a telescope
around 200 meters in diameter to see it. The largest telescope now is
the Keck Telescope in Hawaii at 10meters in diameter. Even the Hubble
Space telescope is only 2.4 meters in diameter. Resolving the lunar
rover, which is 3.1 meters in length, would require a telescope 75
meters in diameter. So our backyard 6 inch and 8 inch telescopes are
not even going to come close!
Why does the flag look like its waiving in the "wind"?
Obviously there is no "wind" for the flag to fly in. Getting a flag
to "fly" on the moon was actually started as a top-secret project
mandated by Congress in the spring of 1969. Flying a flag on the moon
was a complicated issue. First NASA officials had to get passed a
United Nations treaty that bans the national appropriation of outer
space or any celestial bodies. The United States would not and could
not claim the moon as US territory. Raising a flag on the
moon could be taken the wrong way in the eyes of the rest of the world.
The raising of the flag would be a symbol of our nations goal that
began with President John F Kennedy's pledge to Congress on May 26 th
1961:
"I believe this nation should commit itself to achieving the
goal before this decade is out, of landing a man on the moon and
returning him safely to the earth. No single space project in this
period will be more impressive to mankind, or more important for the
long range exploration of space, and none will be so difficult or
expensive to accomplish."
There was also the issue of where to put the flag on the lunar
module to protect it from the elements. A gentleman named Tom Moser, a
young design engineer at Johnson Space Center, was given the task.
Moser developed a collapsible flagpole with a telescoping horizontal
rod sewn into a seam on the top of the flag to extend it outward. The
flag was brought to the moon in a heat resistant tube attached to the
ladder of the lunar module. The flag is rumored to have been purchased
at Sears but is not confirmed.
Neil Armstrong and Buzz Aldrin recalled what happened when they tried to set up the flag: "It took both of us to set it up and it was nearly a public relations disaster, " he wrote, " a
small telescoping arm was attached to the flagpole to keep the flag
extended and perpendicular. As hard as we tried, the telescope wouldn't
fully extend. Thus the flag which should have been flat had its own
permanent wave"
Is the flag still standing?
The answer to this question is not known. It is uncertain if the
flag remained standing or was blown over the by engine blast when the
ascent module took off to return the crew back to Earth. The lunar
surface was barely holding the flag upright enough to begin with, it is
unlikely that the flag is still upright. |

The contents herein, unless
otherwise known to be public domain, are Copyright 1995-2005 -
SpaceDaily. AFP and UPI Wire Stories are copyright Agence France-Presse
and United Press International. ESA Portal Reports are copyright
European Space Agency. All NASA sourced material is public domain.
Additional copyrights may apply in whole or part to other bona fide
parties. Advertising does not imply endorsement, agreement or approval
of any opinions, statements or information provided by SpaceDaily on
any web page published or hosted by SpaceDaily. Privacy Statement
|
|
|
| |